Visits

Tuesday, June 16, 2009

Add sound to almost every event in Windows

sound_wave.jpg (400×300)

XP comes with a new set of sounds that will surely add pizzazz to the way you work in Windows. But there's one problem -- you need to actually turn on the Windows default sound scheme before you'll be able to hear them.


To turn on the Windows XP default sound scheme, follow these directions:

Single-click the Start menu.
Single-click the Control Panel.
Single-click the Sounds, Speech, and Audio Devices icon.
Single-click the Sounds and Audio Devices icon or the text labeled "Change the sound scheme."
Make sure you're on the Sound tab and locate the pull-down menu under Sound scheme.
Select the Windows Default option and press Apply. Windows will ask you if you want to save the previous sound scheme. Since there wasn't a sound scheme already loaded, just choose No.

If you look under the text labeled "Program events," you'll be able to sample your new sounds or customize them with your own. Read Customize Events Sounds if you'd like to learn how to do this yourself.

Remove the Recycle Bin from the Desktop (in XP)

untitled-1-300x276.jpg (300×276)

If you don't use the Recycle Bin to store deleted files , you can get rid of its desktop icon all together.

Run Regedit and go to:

HKEY_LOCAL_MACHINE/SOFTWARE/Microsoft/Windows/CurrentVersion/explorer/Desktop/NameSpace

Click on the "Recycle Bin" string in the right hand pane. Hit Del, click OK.

Use Google as Dictionary

dictionary-google.jpg (300×204)

Did you ever know that you can use Google as a dictionary?

Yes, you read it right! Now you don’t have to search online dictionaries or thesauruses - Use Google as your Dictionary!

How-To:

1. Log onto
http://www.google.com .
2. Type this : “Define: Your word Here” [Without Quotes]
3. Done! You will be given a list of definitions for your requested word!

For example: If you want the definition of the word “Boy”, type this: Define: boy

Manage 2 Google Accounts in the Same Browser

GoogleLogoOnWall.jpg (400×266)

Normally, when you open up multiple Firefox windows, they share the same cookie data. If you’re logged in to one account on a website, and you open up another browser, you are automatically logged into that same account on that same website automatically. This is designed behavior in Firefox.

To set this up to work first you need to create 2 profiles.

* Close all your firefox windows
* do Start -> Run and then run this command: “c:\program files\mozilla firefox\firefox” -ProfileManager
* Create another profile using the profile manager
* Create a shortcut to user your second profile (you need to know what you named it, and it is case sensitive)
* Right click on the firefox icon on your desktop and select “create shortcut”
* Right click on the new icon and select properties
* The target field in the new window is something like: “C:\Program Files\Mozilla Firefox\firefox.exe”. Change it to be: “C:\Program Files\Mozilla Firefox\firefox.exe” -P “YourProfileName” (where YourProfileName is the name of the new profile you just created)

You’re now done creating the profiles.

P.S.-Althought I don't know how to do the same in Linux. Any help??

Now, you need to do the small hack.

Go to Control Panel -> System -> Advanced -> Environment Variables -> System Variables -> New

In the 2 boxes, put MOZ_NO_REMOTE and 1 (so you are setting the environment variable MOZ_NO_REMOTE=1) and click ok, ok, ok.

That’s it. When you open firefox normally (with the normal icon) it will open your default profile.
When you click on the second shortcut (the one you just made), it will open your second profile.

The two magically don’t share cookies, and now you can login to 2 gmail accounts at the same time, without using IE.

This will also work with any other site (not just gmail and google accounts) that requires you to login.

Speed Up Browsing

speed.jpg (434×314)
When you connect to a web site your computer sends information back and forth. Some of this information deals with resolving the site name to an IP address, the stuff that TCP/IP really deals with, not words. This is DNS information and is used so that you will not need to ask for the site location each and every time you visit the site. Although Windows XP and Windows XP have a pretty efficient DNS cache, you can increase its overall performance by increasing its size. You can do this with the registry entries below:

Windows Registry Editor Version 5.00
[HKEY_LOCAL_ MACHINE\SYSTEM\ CurrentControlSe t\Servic es\Dnscache\ Parameters]
"CacheHashTableBucke tSize"=dword:00000001
"CacheHashTableSize"=dword:00000180
"MaxCacheEntryTtlLim it"=dword:0000fa00
"MaxSOACacheEntryTtl Limit"=dword:0000012d

Make a new text file and rename it to dnscache.reg. Then copy and paste the above into it and save it. Merge it into the registry..

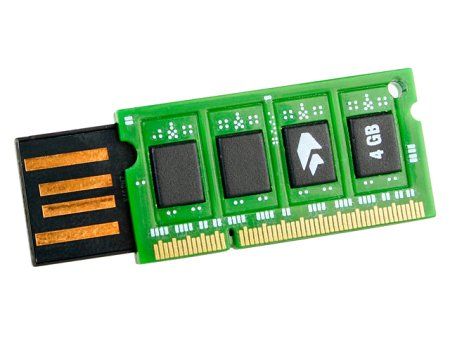
How To Use USB FlashDrives As RAM (VISTA ONLY)

ram-shaped-usb-drive.jpg (450×338)
Windows Vista has a new performance feature called ReadyBoost. This feature enables the use of a USB storage device instead of the slow paging file on your hard disk when you're low on physical memory (RAM). The logic is simple - the USB storage device is faster than your hard disk drive.
In order for ReadyBoost to work in Windows Vista, your USB storage device must meet the following requirements:
- the device must have at least 64MB storage.
- the device must be USB 2.0 compatible.
- the device must have a minimum read speed of 3.5 MB/s.
- the device must have a minimum write speed of 2.5 MB/s.


Follow these steps to enable ReadyBoost:
1. Plug in USB storage device.
2. Go to Computer, right-click on the removable storage device and select Properties.
3. Click on the ReadyBoost tab.
4. Select Use This Device and set the amount of space to use for the system file.
5. Click OK.